How to build Contact us page with Sveltekit and Supabase
We will build the Contact Us page with SvelteKit and integrate it with Supabase. We will use the Carbon components to create the input fields and then store the data on the contact page to the Supabase table.-
 Sriram Thiagarajan
- January 14, 2022
How to build Contact us page with Sveltekit and Supabase
Introduction
Building an online presence takes time and effort and you will need to persuade your potential customers to make the intial contact. It is essential to have a good looking and working contact form in your website. We will create a form in SvelteKit and then use Supabase as a backend to store the form data.
Getting Started with SvelteKit
SvelteKit is a framework for building web applications that has an awesome developer experience and you can create powerful apps. It combines the power of Server Side Rendering (SSR) and navigation benefits of Single Page Applications (SPA)
Don’t worry if you are unfamiliar with these terms above, it means that your project gets the benefit of having a SEO (Search Engine Optimization) to rank higher in search engine. When you navigate from one page to another, the whole site is not reloaded like in traditional applications.
If you want to learn more on these, visit the SvelteKit Website
Note: As of writing of this post, SvelteKit is not Production ready and so please check the latest version of the SvelteKit if you are planning to build a production ready application.
Creating your first project
Let’s create a new project.
It is easy to get started with a new project. You can just type the following command on the terminal and you will get a scaffold of SvelteKit app ready to use.
npm init svelte@next my-app
cd my-app
npm install
npm run dev
SvelteKit is an opinionated framework which has file-system based routing. Creating a new page is as easy as creating an new file in the src\routes folder. In the scaffold, you can find the index.svelte file inside the src\routes folder which will be used as the landing page of the application.
What are we building today ?
We are going to build a couple of pages for a fictional company which will have a contact us form and it will store the data to Supabase.
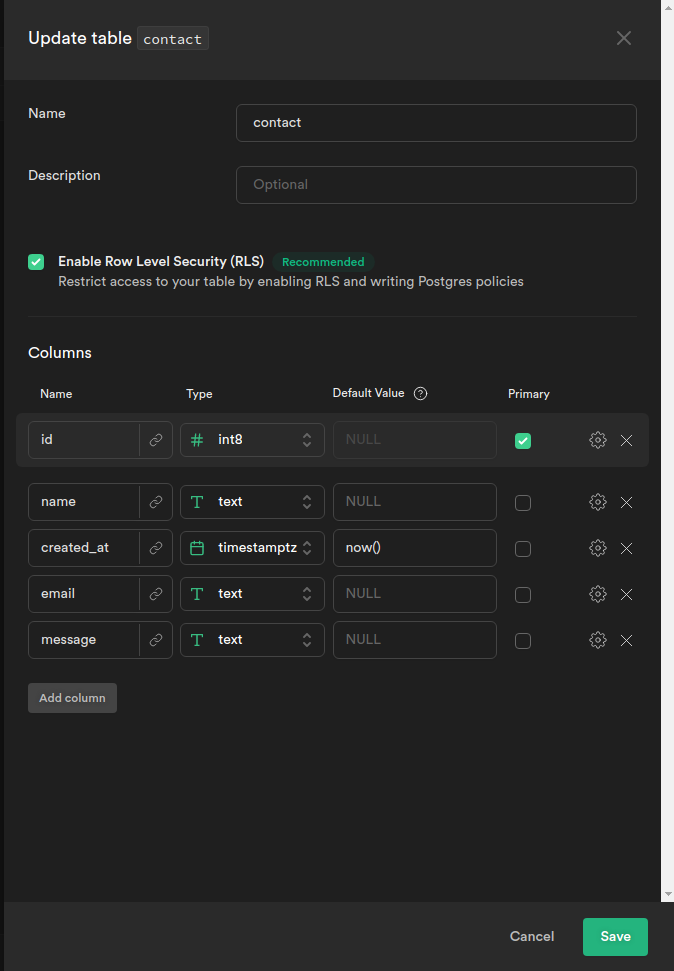
Creating the form data in supabase
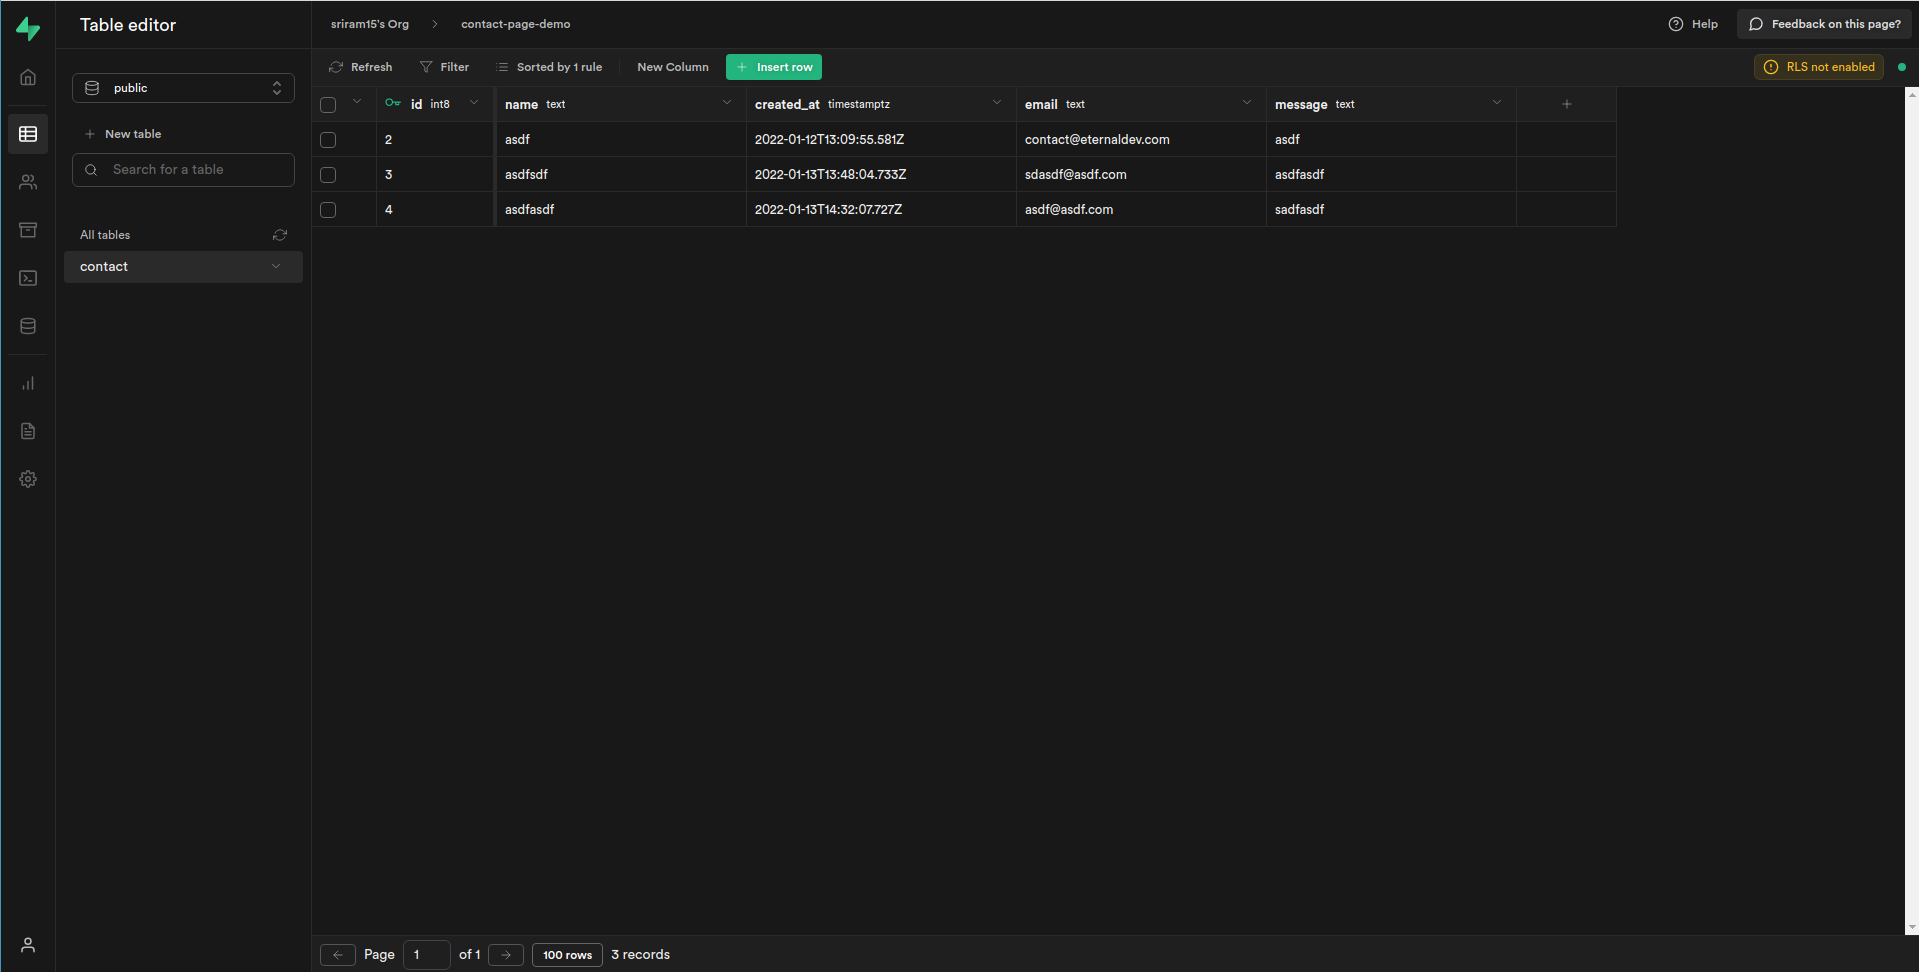
Create a new project in Supabase. We have named the project contact-page-demo. You might have to wait for a few minutes for the project to be ready. Then you are good to go.
Create a new table in your project which will hold the data. Each entry made by any visitor in your website will be stored as a new row in the table. We are going to fetch the following details from the users and store them to the database
- Name
- Message
User will be filling in these three fields. We will store this data in the table and then use the data to get in touch with the user
Steps in Supabase
- Create a table
contactin your supabase project - Add the following fields to the table
Integration of SvelteKit with Supabase
We need a way to integrate Supabase in SvelteKit so that we can store the data in the table. After updating the data in the table, we can make use of the data in some way to send some personalized response to the user.
Let’s create a .env file at the root of the project to store the variable for the Supabase url and key
VITE_SVELTE_APP_SUPABASE_URL=xxxxx
VITE_SVELTE_APP_SUPABASE_ANON_KEY=xxxxxx
Adding
VITEto the start of the variable makes it visible in the client side code. Check the documentation of vite environment variables
You can find these variables in the following pages
- Supabase Anon Key - Settings → API → Project API Keys
- Supabase Url - Settings → API → Config
Add those details to the .env file and then you can create a new file in the src folder called supabaseClient.ts
import { createClient } from '@supabase/supabase-js'

const supabaseUrl = import.meta.env.VITE_SVELTE_APP_SUPABASE_URL;
const supabaseAnonKey = import.meta.env.VITE_SVELTE_APP_SUPABASE_ANON_KEY;

export const supabase = createClient(supabaseUrl, supabaseAnonKey)
Creating the layout file in SvelteKit
We will start by designing the structure of the website. SvelteKit provides a nice way to define a layout file which will be used in all the routes. You can do this using the __layout.svelte file in the routes folder. The layout file should contain a slot element which will be replaced by the content in each of the routes.
Awesome feature if you ask me and which will save a lot of time when defining the project. Modern web applications will need to have some navigation bar. This can be defined in the layout file and magically all the routes will now have it.

<div class="content">
    <nav>
        <span class="company-title">Company Name</span>
        <ul>
            <li><a href="/">Home</a></li>
            <li><a href="/about">About</a></li>
            <li><a href="/contact">Contact Us</a></li>
        </ul>
        <div>
            <a href="/login">Login</a>
        </div>
    </nav>

    <slot></slot>
</div>

<style>

    .content {
        padding: 20px 10px;
    }

    nav {
        margin: 0;
        display: flex;
        justify-content: space-between;
        align-items: center;
    }

    ul {
        list-style-type: none;
        display: flex;
        gap: 60px;
    }

    a {
        text-decoration: none;
        color: black;
    }

    a:hover {
        text-decoration: underline;
    }

    .company-title {
        font-size: large;
        font-weight: bold;
    }
</style>
The important thing to note here is the after the nav element, we have the slot element which will contain the different content of the routes.
Installing carbon component for svelte
We will make use of the carbon component library created for svelte. This step is optional and we are using it to make our application look good and get some input form elements out of the box. So let’s install the carbon component.
npm i -D carbon-components-svelteAfter installing the npm package, we need to add one of the carbon themes in our layout file to start using the carbon components.
Let’s add the css file to the src/__layout.svelte file
<script lang="ts">
    import "carbon-components-svelte/css/g10.css";
</script>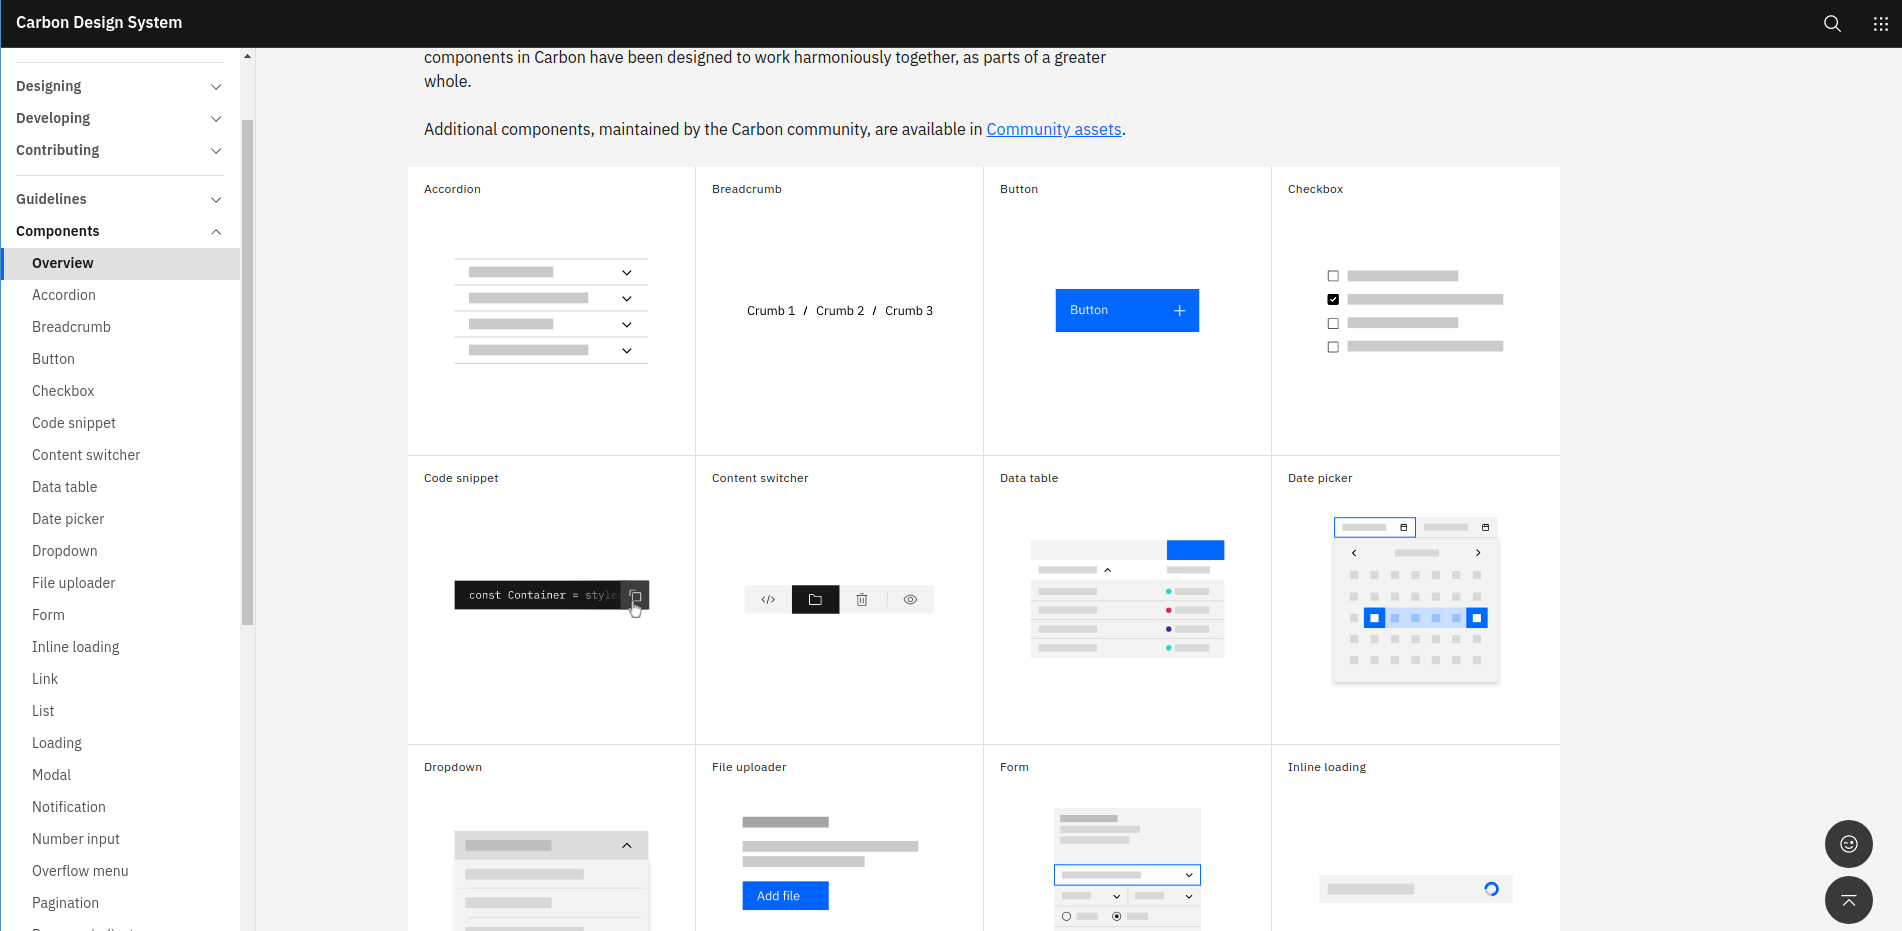
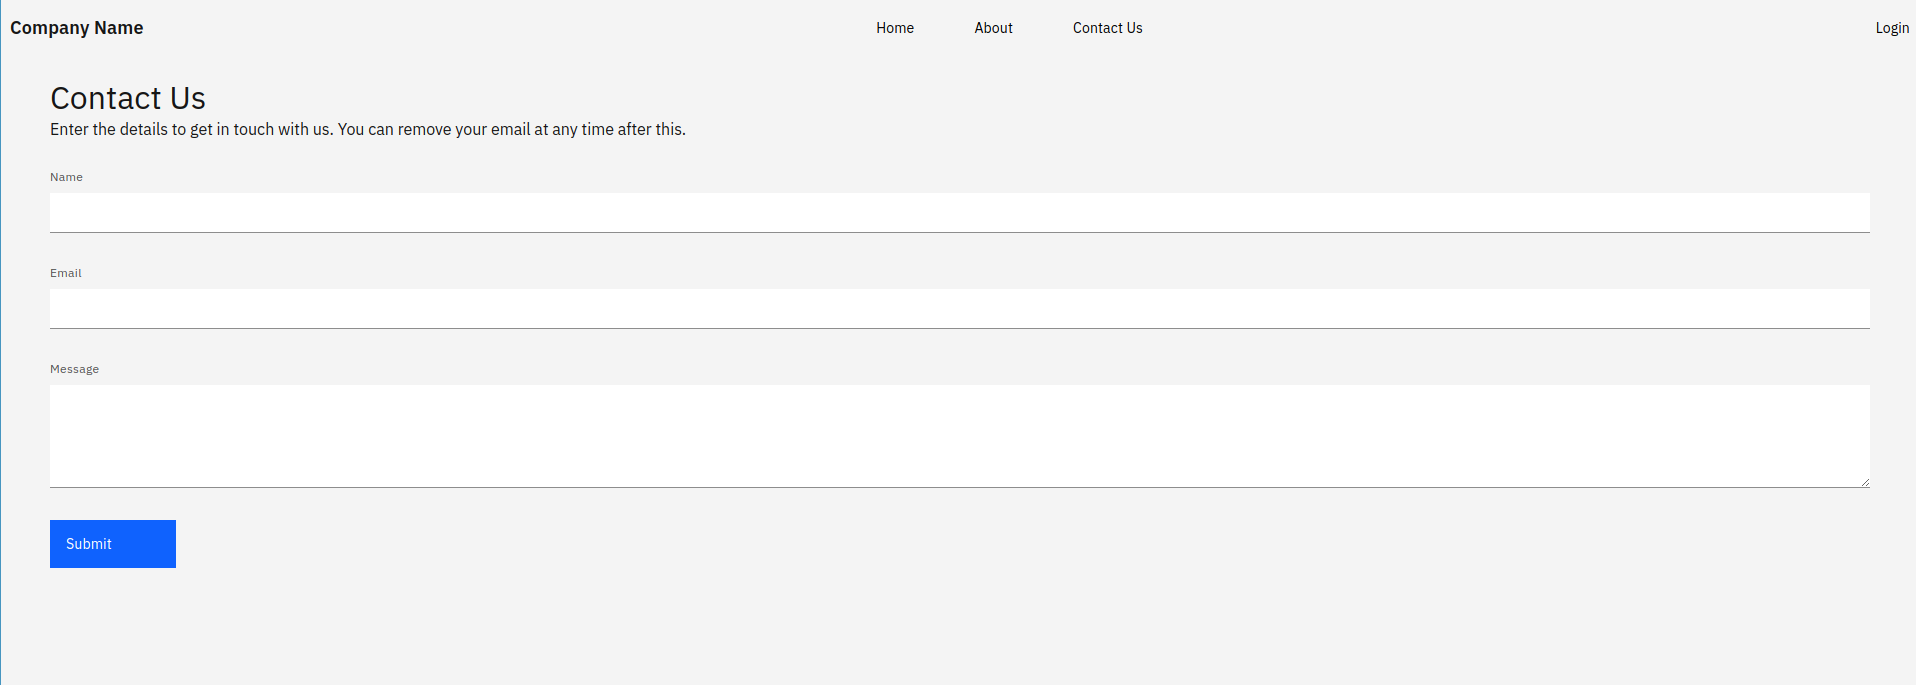
Creating the contact us page
We have all the things ready to create the contact page with forms which will connect with Supabase to store the data.
Installing the svelte-forms-lib
We are going to use an npm library for managing the form elements. This might be an overkill for this small form but it will help in reducing the code. We can install the package using the following code
npm install svelte-forms-libFor more details on this package, please check the Svelte forms lib website
This library provides multiple ways to create the form. You can use the createForm method to create a new form. It will provide multiple variables which will help in building the form and the page.
You can have a look at the basic example here
Creating the Form component
<script>

    import { TextInput, TextArea, Button, FormGroup, Form } from "carbon-components-svelte";
		import { createForm } from "svelte-forms-lib";

    const { form, errors, handleChange, handleSubmit, isSubmitting } = createForm({
        initialValues: { name: "", email: "", message: "" },
        onSubmit: async values => {
            console.log(result);
      }
    });

</script>
<div class="page">

    <h2>Contact Us</h2>
    <p>Enter the details to get in touch with us. You can remove your email at any time after this.</p> <br/><br/>

    <Form on:submit={handleSubmit}>

        <FormGroup>
            <TextInput labelText="Name" name="name"
                on:change={handleChange} bind:value={$form.name}/>
        </FormGroup>

        <FormGroup>
            <TextInput labelText="Email" name="email" type="email"
            on:change={handleChange} bind:value={$form.email}/>
        </FormGroup>


        <FormGroup>
            <TextArea labelText="Message" name="message" type="textarea"
            on:change={handleChange} bind:value={$form.message}/>
        </FormGroup>

        <Button type="submit" disabled={$isSubmitting}>Submit</Button>
    </Form>
</div>
Let’s breakdown the above code
- Import the
createFormfrom thesvelte-forms-lib - Pass the
initialValueswhich are empty string to thecreateFormmethod - Pass an
onSubmithandler to process the form data on click of thesubmitbutton
Now we can use the form component we downloaded as part of Carbon components. Form and FormGroup component can be used to group the elements.
TextInputcomponent is used to enter text for the user. Set the name property to the name of the field. Bind the value of the text field to the$form.name. Setting theon:changeevent to thehandleChangemethod of the svelte-forms-libTextAreacomponent is used to display a text area to enter a bigger text. All the other properties are same of the other componentButtoncomponent can be used to show the “Submit” button
Adding the API to call
Let’s add the API call on the submit of the form. We will make use of the supabaseClient file which we created before. We will take the form data and send it to the supabase table to store it there.
<script>
    import { supabase } from "../../supabaseClient";

		let apiResult = null;

    const { form, errors, handleChange, handleSubmit, isSubmitting, handleReset } = createForm({
        initialValues: { name: "", email: "", message: "" },
        onSubmit: async values => {

            try {
                var result = await supabase.from("contact").insert(values);

                if (result.data != null) {
                    apiResult = true;
                } else {
                    apiResult = false;
                }

            } catch (ex) {
                apiResult = false;
            }

            handleReset();
      }
    });
</script>
The main thing to note here is supabase.from("contact").insert(values). This will call the supabase API and then we are awaiting the result. The result will be stored in the result variable. When the data property in resultis not null, then the API is successful. If there is any error or exception, we are setting the apiResult to false.
Adding success and error states
We will make use of InlineNotification component to show the result of the API call. Based on the success or failure, we are showing the message in the UI to notify the user after the event.
<h2>Contact Us</h2>
    <p>Enter the details to get in touch with us. You can remove your email at any time after this.</p> <br/><br/>

    {#if apiResult != null}

        {#if apiResult == true}
        <InlineNotification
            lowContrast
            kind="success"
            title="Success:"
            subtitle="Your message has been received"
        />
        {:else}
        <InlineNotification lowContrast kind="error"
            title="Error:"
            subtitle="An internal server error occurred."
        />

        {/if}
    {/if}
Adding Validation
We can add simple validation for the form to make sure that form is not submitted with empty data. This can be achieved using simple javascript by checking the variables. If you have a more complicated validation, you can use the Yup package to show more advanced validation logic and add user-friendly validation messages.
npm install yupThis step is also optional, you can add more simple logic to check the variables, but this will show how to use the validation for bigger froms.
const validationSchema = yup.object().shape({
      name: yup.string().required('Please enter a name'),
      email: yup.string().email().required('Please enter a valid email'),
      message: yup.string().required('Please enter a message')
});

const { form, errors, handleChange, handleSubmit, isSubmitting, handleReset } = createForm({
        initialValues: { name: "", email: "", message: "" },
        validationSchema: validationSchema,
        onSubmit: async values => {
						.......
				}
});
Let’s breakdown the above code
- We are creating a
validationSchemavariable which will contain the validations - Each property can have it’s own validation logic with custom validation message.
nameproperty is a string value and it’s required. The string entered in the required method will be the custom validation messageemailproperty is a string value. It should follow the general validation of email and it’s requiredmessageproperty is a string value. It is also a required property.- Once we have defined the variables for the validations, we can assign it to the
validationSchemaproperty increateFormwhich will handle the validations.
<Form on:submit={handleSubmit}>

        <FormGroup>
            <TextInput labelText="Name" name="name"
                on:change={handleChange} bind:value={$form.name}
                invalid={$errors.name.length > 0} invalidText={$errors.name}/>
        </FormGroup>

        <FormGroup>
            <TextInput labelText="Email" name="email" type="email"
            on:change={handleChange} bind:value={$form.email}
            invalid={$errors.email.length > 0} invalidText={$errors.email}/>
        </FormGroup>


        <FormGroup>
            <TextArea labelText="Message" name="message" type="textarea"
            on:change={handleChange} bind:value={$form.message}
            invalid={$errors.message.length > 0} invalidText={$errors.message}/>
        </FormGroup>


        <Button type="submit" disabled={$isSubmitting}>Submit</Button>
    </Form>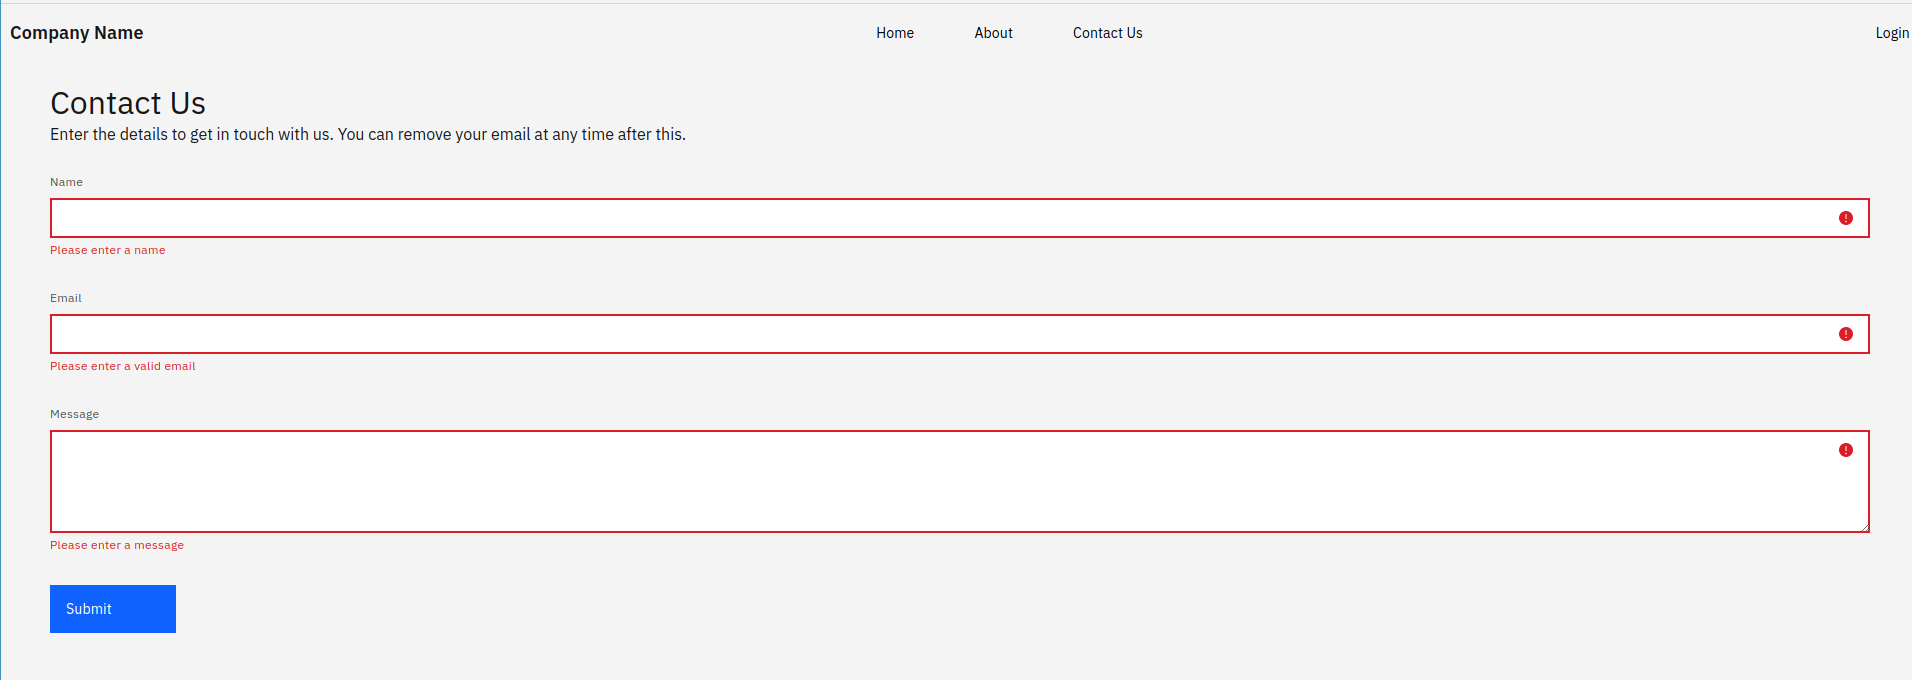
We just have to update the TextInput and TextArea components to show the validation messages using the invalid and invalidText props.
Finishing up the form
That’s all is needed to store the contact data in Supabase table. You can check the database on who has contacted and respond back to their message. You can even extend this setup to trigger an email once the contact form is filled using a custom backend app
Let’s look at the whole code for the contact page
<script>
    import { supabase } from "../../supabaseClient";

    import { createForm } from "svelte-forms-lib";
    import * as yup from "yup";

    import { TextInput, TextArea, Button, FormGroup, Form, InlineNotification } from "carbon-components-svelte";

    const validationSchema = yup.object().shape({
        name: yup.string().required('Please enter a name'),
        email: yup.string().email().required('Please enter a valid email'),
        message: yup.string().required('Please enter a message')
    });

    let apiResult = null;

    const { form, errors, handleChange, handleSubmit, isSubmitting, handleReset } = createForm({
        initialValues: { name: "", email: "", message: "" },
        validationSchema: validationSchema,
        onSubmit: async values => {

            try {
                var result = await supabase.from("contact").insert(values);

                if (result.data != null) {
                    apiResult = true;
                } else {
                    apiResult = false;
                }

            } catch (ex) {
                apiResult = false;
            }

            handleReset();
      }
    });

</script>
<div class="page">

    <h2>Contact Us</h2>
    <p>Enter the details to get in touch with us. You can remove your email at any time after this.</p> <br/><br/>

    {#if apiResult != null}

        {#if apiResult == true}
        <InlineNotification
            lowContrast
            kind="success"
            title="Success:"
            subtitle="Your message has been received"
        />
        {:else}
        <InlineNotification lowContrast kind="error"
            title="Error:"
            subtitle="An internal server error occurred."
        />

        {/if}
    {/if}
    <Form on:submit={handleSubmit}>

        <FormGroup>
            <TextInput labelText="Name" name="name"
                on:change={handleChange} bind:value={$form.name}
                invalid={$errors.name.length > 0} invalidText={$errors.name}/>
        </FormGroup>

        <FormGroup>
            <TextInput labelText="Email" name="email" type="email"
                on:change={handleChange} bind:value={$form.email}
                invalid={$errors.email.length > 0} invalidText={$errors.email}/>
        </FormGroup>


        <FormGroup>
            <TextArea labelText="Message" name="message" type="textarea"
                on:change={handleChange} bind:value={$form.message}
                invalid={$errors.message.length > 0} invalidText={$errors.message}/>
        </FormGroup>


        <Button type="submit" disabled={$isSubmitting}>Submit</Button>
    </Form>
</div>

<style>
    .page {
        margin: 40px;
    }
</style>
Conclusion
SvelteKit provides a really nice set of tool for developers to build website and focus on the creative side. We have looked at how to create a contact us page in SvelteKit and integrate with Supabase in this article.
Let us know your thoughts on this and anything else on your mind in our discord server
Discord - https://discord.gg/AUjrcK6eep