How to deploy React vite apps to Netlify
In this article, learn about how to deploy your finished React apps built with Vite to Netlify.-
 Sriram Thiagarajan
- July 24, 2022
How to deploy React Vite apps to Netlify
Introduction
When you finish your application, you need to get it deployed to the site for the world to experience your excellent app. You can do it using Netlify to host your application. You can build a Static site of your app and then get it hosted in Netlify.
In this article, you will learn how to deploy your svelte app which uses Vite as the build tool. Vite lets you build a static site and get it hosted in Netlify.
What is a Static Site?
Static sites are simple websites that contain pre-build HTML, CSS, and JS files which are served by the hosted server. Static sites are usually fast as there are pre-built and the same content is shown for all the users. These sites are perfect when you are building your digital presence for any company site or other promotional content for your viewers.
Building the React app for Production
Project initialization
Let’s create a new React app and build the app for production.
npm create vite@latestThen it will prompt for the name and other details of the vite project. Name the project and select “React”.
If you want to enable TypeScript in your project, you can select “react-ts”.

After this open the folder and install the packages.
cd <project-name>
npm install
npm run dev
npm run dev command will start the development server.
Building the application for production
This article is assuming that you want the starter project to be deployed to the server. You can make any changes in the React code at this point before doing the following production build.
npm run build
The build command should create a new dist folder in your base directory which will contain the files needed to serve your static site.
What is Netlify?
Netlify is a web hosting and automation platform which you can use to deploy your static sites. You will have to Sign up to Netlify if you don’t have an account already and then you can create a new app from their menu.
To learn more about Netlify and its pricing - check the official page. You can have a free account for your Personal projects.
Manual Netlify Deployment
It is possible to deploy your changes manually just by dragging and dropping the folder into Netlify. This is not the ideal approach for a big project as it involves manual effort but it is a very quick way to see your project live.
Select “Add new site” and then select “Deploy manually”. This will open a new page where you can drag and drop the folder to publish. That’s neat 🙂
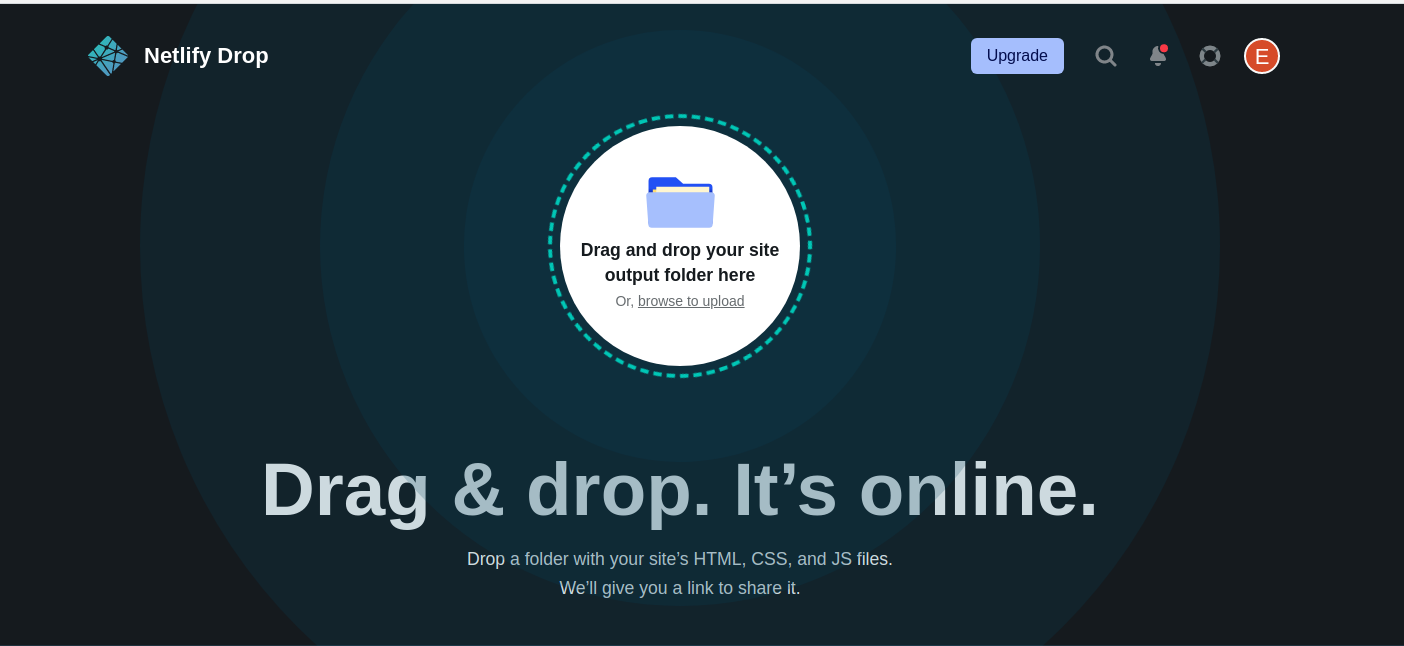
Drop the “dist” folder which got created after running the “npm run build” command and you are good to go.

A new site will be created with your deployed folder content like below. Access the url and your app should be visible
Netlify CLI
You can also install the Netlify CLI to perform these actions. Install the CLI using the following command
npm install -g netlify-cliYou can initialize a new project in Netlify using the following command. It will ask for authentication and authorization of the CLI in a web browser. Once you accept those you can set up your initial project in the cmd
ntl init
Manual Deployment using Netlify CLI
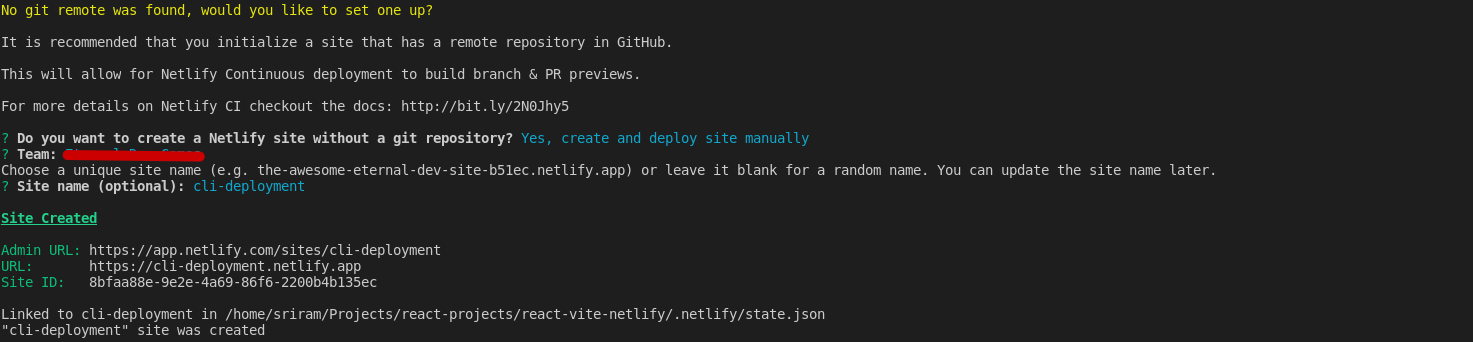
If you want to do a manual deployment and not store the code in Git, you can do the option “Yes, create and deploy site manually”
This will prompt for a few details about the site and the team which this site should be associated with. Once you provide that information, you will end up with a new site with a URL to the browser. This site is now ready to accept the deployments.
The next step is to deploy your code to the site. You can run the following command to deploy the content inside the “dist” folder.
ntl deployThis will deploy your site to a Draft URL which is great to do some testing before releasing to Production. You can verify your site in this draft url.

Once you are ready to deploy to the actual production, You can run the deploy command with --prod flag to mention to do production deployment.
ntl deploy --prod
Your website is ready to browse and for the whole world to enjoy.
Git and Github as version control in Netlify CLI
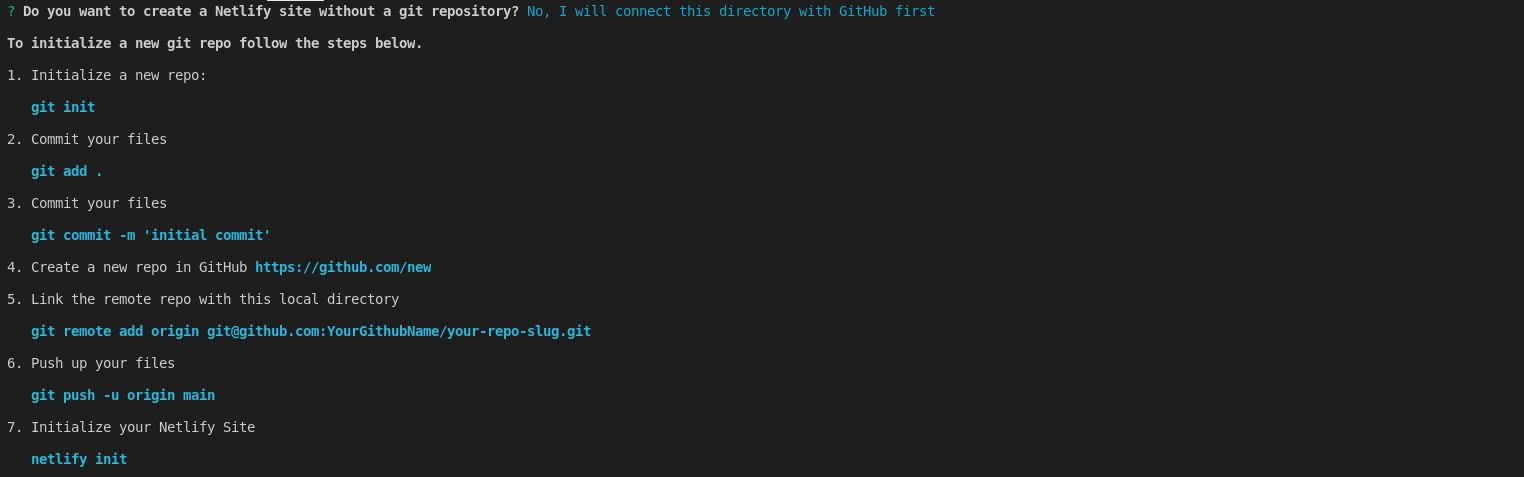
You can choose to connect to your Github account by following the steps provided in the CLI. Once you do that your GitHub project will be linked to the Nelify site. You can then enable Continous Deployments and other cool features to easily manage your deployments.
After connecting your site with Github, you can follow the same steps to deploy your code to Netlify.
ntl deploy
ntl deploy --prod
More information
Official Documentation - https://vitejs.dev/guide/static-deploy.html