How to make an API call in Svelte
Learn how to make an API call in svelte with loading and error states. Fetching data from the API is an essential part of any application so learn how Svelte makes it easy.-
 Sriram Thiagarajan
- January 25, 2022
How to make an API call in Svelte
Introduction
Useful applications need a way to fetch and store the data which is being displayed to the users. This involves calling custom backend APIs or public APIs from the Svelte applications to show the relevant information. Let’s look at how to make this process simple in Svelte by fetching public API
NOTE: If you want the TDLR version, scroll to the bottom to see the code
What is an API?
API stands for Application Programming Interface (API) which is like a contract between the multiple applications to get or send the data. You can imagine it as a structure of data that has been agreed upon by the engineers in the team. So it is helpful for both the frontend and backend developers to write their logic based on the structure of the data.
You have built a beautiful frontend application and now you think it will be great if you can display the weather data for your home city on the page. Since the weather data is dynamic and changing constantly, you need to rely on some third party to get that information. Your application now needs to communicate with the other weather data-providing application. A third-party website will provide some API that can be used to do this communication.
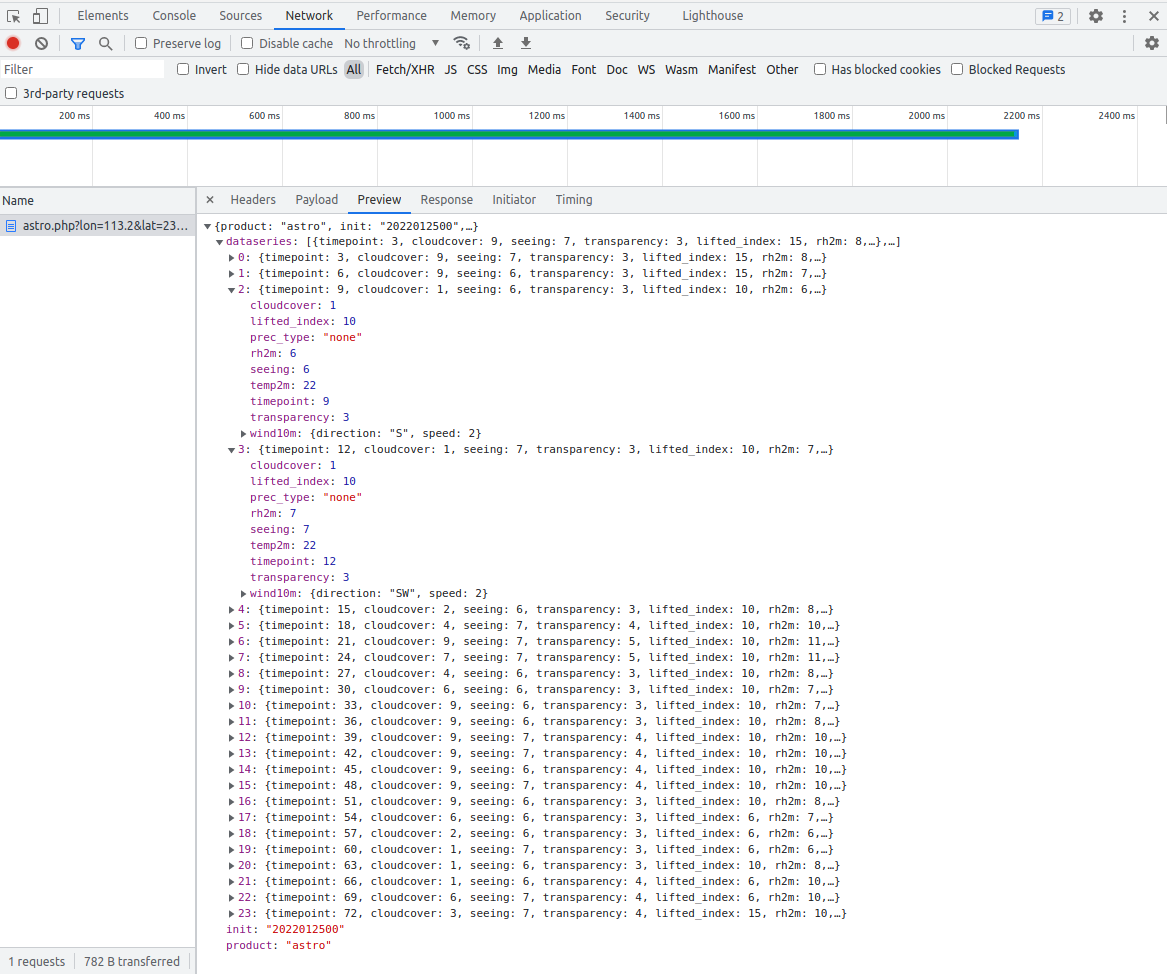
Example of weather data with a predefined structure
Using fetch to call the API
Let’s use the browser fetch to call the API to get data. We will use https://randomuser.me/ to get random user data.
<script>
	const getRandomUser = async () => {
		var response = await fetch('[https://randomuser.me/api/](https://randomuser.me/api/)');
		var result = await response.json();
		return result;
	}

	let userPromise = getRandomUser();
</script>
Create an async function getRandomUser which will return the result of the API call. We can use a variable to store the promise returned from the getRandomUser function.
Using Svelte await promise syntax
{#await PROMISE_VAR then RESULT_VAR}
	<b>{RESULT_VAR}</b>
{/await}
Using the #await syntax will help in waiting for the promise to return and then show the data. The following syntax can be used to show the data
{#await userPromise then users}
	<h2>{users.results[0].name.first}</h2>
{/await}
Showing loading and error message
We can add loading and error messages easily in svelte when using the await syntax. This is the brilliance of the svelte framework which knows that loading and error states are very common and essential when displaying the data fetched from API. So it provides an easy way to do that using the following syntax
{#await PROMISE_VAR}
	<b>Loading block</b>
{:then RESULT_VAR}
	<b>{RESULT_VAR}</b>
{:catch ERROR_VAR}
	<b>Error block</b>
{/await}
Let’s implement that in our example
- We are showing an H2 loading message in the loading block. This can be replaced by any HTML which means you can have any complex animation or component to show the loading state
- Display the result once the data is available
- Error block which gets displayed when the promise is rejected or has network error.
{#await userPromise}
	<h2>Loading....</h2>
{:then users}
	<h2>{users.results[0].name.first}</h2>
{:catch err}
	<h2>Error while loading the data</h2>
{/await}
Full example for API Call in svelte
<script>
	const getRandomUser = async () => {
		var response = await fetch('https://randomuser.me/api/');
		var result = await response.json();
		return result;
	}

	let userPromise = getRandomUser();
</script>

<h1>Random User name</h1>

{#await userPromise}
	<h2>Loading....</h2>
{:then users}
	<h2>{users.results[0].name.first}</h2>
{:catch err}
	<h2>Error while loading the data</h2>
{/await}
Conclusion
Svelte makes it easy to load the API and show the different states to the user which is an integral part of any frontend application. Let us know what you think about this article and join the discussion in our discord community
Discord - https://discord.gg/AUjrcK6eep