Learn about Drag and Drop API with Svelte by building a game
Learn Svelte by making a match-three game. Learn about the HTML Drag and Drop API-
 Sriram Thiagarajan
- September 9, 2021
Learn about Drag and Drop API with Svelte by building a game
Most of us with a half-decent phone would have experienced some form of matching the grid items type games. It has a simple but often satisfying loop of matching three or more of the same items on the same row or column. This game presents a good opportunity for learning about drag and drop in a fun way.
This post is inspired by the awesome Youtube video teaching in vanilla JavaScript and I wanted to take my spin on that project in Svelte.
Initial Setup
Let’s start with creating a new repo for this project
npx degit sveltejs/template svelte-match-three-game
cd svelte-match-three-game

# to use TypeScript run:
# OPTIONAL to run the following command
node scripts/setupTypeScript.js
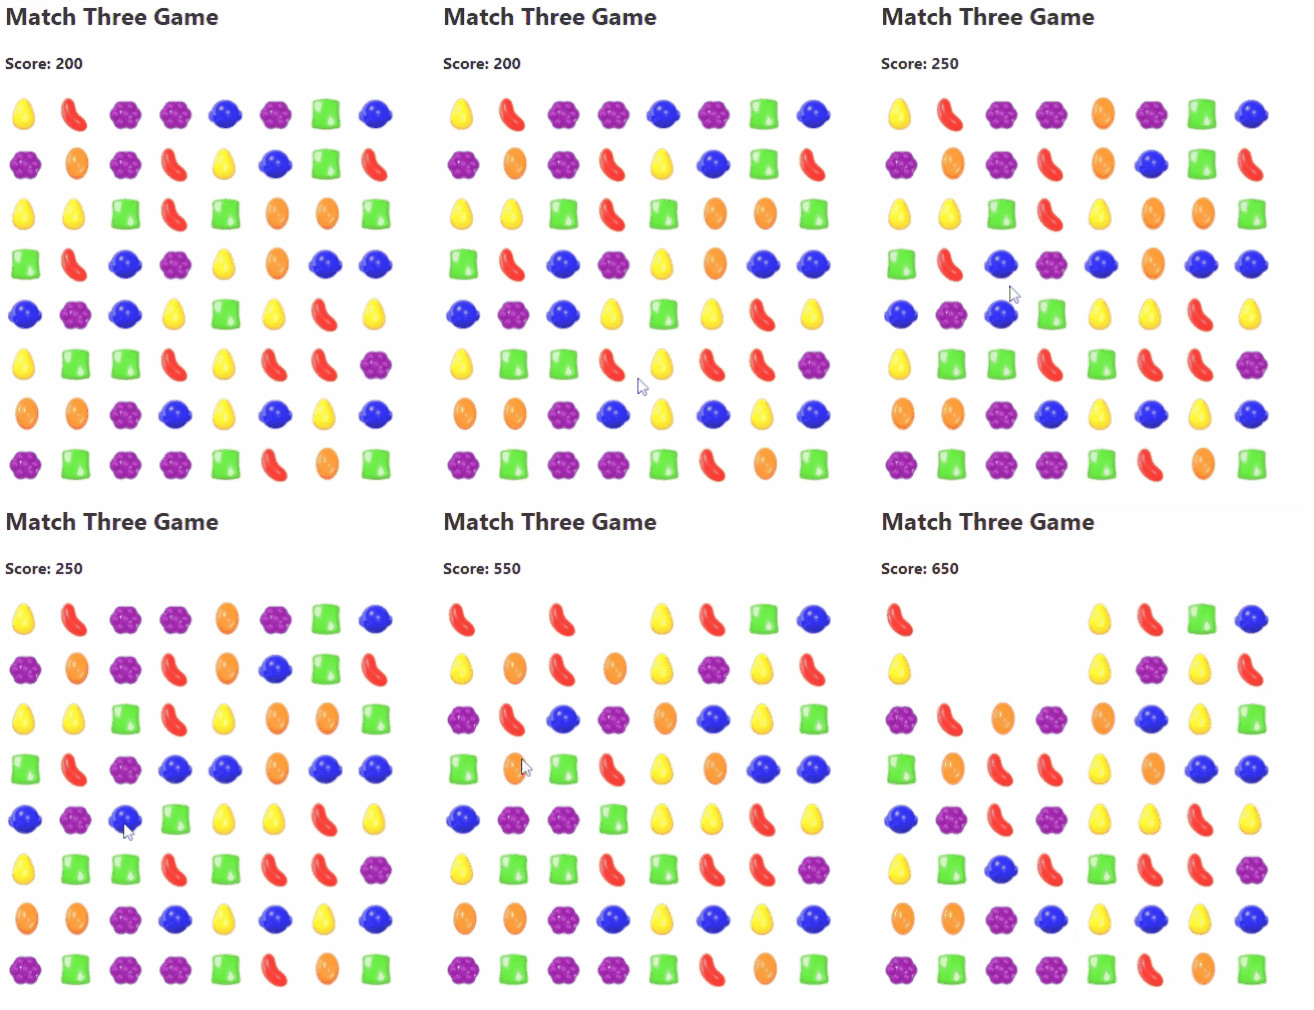
What are we building
- Simple match-three game with drag and drop of the HTML elements
- Score to keep track of the player score
- New tiles drop from the top after the matching elements are removed
Building a grid of items
We need some models as always to represent our game logic. We will take advantage of typescript and do that now. We can define an enum for our different grid items tiles
Create a models.ts file and add all our models into this file
export type GridItemData = {
	name: string;
	backgroundImage: string;
	type: GridItemType
}
export enum GridItemType {EMPTY, RED, GREEN, BLUE, ORANGE, YELLOW, PURPLE}

export const EmptyGridItem: GridItemData = {
	name: 'Empty',
	backgroundImage: "",
	type: GridItemType.EMPTY
}
export const gridItemList: GridItemData[] = [
	{ name: "red", backgroundImage: "images/red.png", type: GridItemType.RED },
	{ name: "blue", backgroundImage: "images/blue.png", type: GridItemType.BLUE },
	{ name: "green", backgroundImage: "images/green.png", type: GridItemType.GREEN },
	{ name: "orange", backgroundImage: "images/orange.png", type: GridItemType.ORANGE },
	{ name: "yellow", backgroundImage: "images/yellow.png", type: GridItemType.YELLOW },
	{ name: "purple", backgroundImage: "images/purple.png", type: GridItemType.PURPLE },
];
So what are these models? Why do we need all these items? Well, typescript can help us manage our application better by having type-safe operations.
GridItemData - Used to store all the data about the grid item (Container for data)
GridItemType - Enum value to store the type of the grid item. Let’s take 6 types of candies each with a particular color. We also have one Empty Griditem to denote the empty space after the match of the grid items
EmptyGridItem - This is an object which represents the Empty Grid. This is for ease of use to replace the matched items with an empty grid
gridItemList - This is the list of all the items which can appear in the grid. We will choose a random item from this list
Create a grid of items
app.svelte
<script lang="ts">
	import { onMount } from "svelte";
	import { GridItemData, gridItemList} from "./models";

	let grid: GridItemData[][] = [];
	let width = 8;

	onMount(() => {
			InitializeGrid();
	});

	const InitializeGrid = () => {
		for (var i = 0; i < width; i++) {
			grid[i] = [];
			for (var j = 0; j < width; j++) {
				var randIndex = Math.floor(Math.random() * gridItemList.length);

				if (randIndex < gridItemList.length)
					grid[i][j] = gridItemList[randIndex];
			}
		}
	};
</script>

<main>
	<h2>Match Three Game</h2>

	<div class="board">
		{#each grid as griditemrow, i}
			{#each griditemrow as griditem, j}
				<div class="gridItem">
					<img src={griditem.backgroundImage} alt={griditem.name} width="40px" height="40px"/>
				</div>
			{/each}
		{/each}
	</div>
</main>

<style>
	.board {
		width: 400px;
		display: flex;
		flex-wrap: wrap;
	}

	.gridItem {
		width: 50px;
		height: 50px;
	}
</style>
We want to create a grid with 8 rows and 8 columns and the initial grid will just be a random distribution of all the items in the grid. So we can call the InitializeGrid() on the mount of the component to set the items in the grid.
2D Array
I thought it will be easy to use a 2D array of items in this example to get an easier understanding of row and column. This can be done using a single dimension array as well by converting the index into row and column
A simple formula for converting index into rows and columns is as below
row = Math.floor(index / width)
col = Math.floor(index % width)

Example: 23
row = 23 / 8 = 2
col = 23 % 8 = 7

grid[2][7] = 3rd row, 8th column item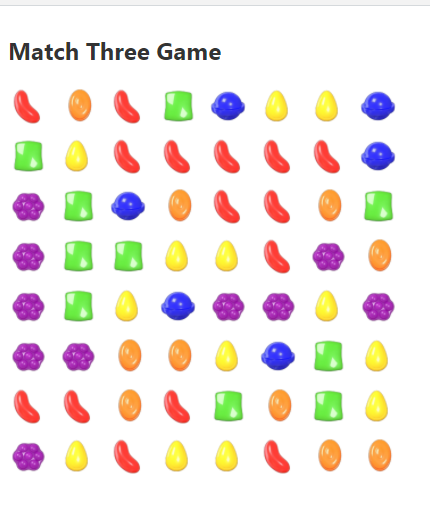
Intro to drag and drop API
HTML Drag and Drop API helps in making our user interactions. Users can drag the item and drop them in another grid to interchange them. We can convert an HTML element into a draggable element by adding a simple attribute draggable=true
Highly recommend checking out the Drag and Drop API
We can use some of the events there to make our user interactions
on:dragstart - Save the item being dragged
on:dragover - Save the item being replaced and check if it’s a valid move
on:drop - Replace the two items
You can use the dragover event to control where the item can be dropped
Updating the grid items on drag and drop
	let itemBeingDraggedIndex: number;
	let itemBeingReplacedIndex: number;

	const dragStart = (ev, index) => {
		itemBeingDraggedIndex = index;
	};

	const dragOver = (ev, index) => {
		itemBeingReplacedIndex = index;

		const isNextOrPrevCell =
			itemBeingDraggedIndex == itemBeingReplacedIndex + 1 ||
			itemBeingDraggedIndex == itemBeingReplacedIndex - 1;
		const isAtSameRows = Math.floor(itemBeingDraggedIndex / width) == Math.floor(itemBeingReplacedIndex / width)
		const isAboveOrBelowCell =
			itemBeingDraggedIndex == itemBeingReplacedIndex + width ||
			itemBeingDraggedIndex == itemBeingReplacedIndex - width;

		if ((isNextOrPrevCell && isAtSameRows) || isAboveOrBelowCell) {
			ev.preventDefault();
		}
	};
	const dragDrop = (ev) => {
		SwapItems(itemBeingDraggedIndex, itemBeingReplacedIndex);
	};

	const SwapItems = (itemBeingDraggedIndex, itemBeingReplacedIndex) => {
		let replaceItemRow = Math.floor(itemBeingReplacedIndex / width);
		let replaceItemCol = Math.floor(itemBeingReplacedIndex % width);

		let draggingItemRow = Math.floor(itemBeingDraggedIndex / width);
		let draggingItemCol = Math.floor(itemBeingDraggedIndex % width);

		var temp = grid[replaceItemRow][replaceItemCol];
		grid[replaceItemRow][replaceItemCol] = grid[draggingItemRow][draggingItemCol];
		grid[draggingItemRow][draggingItemCol] = temp;
	};

<main>
	<h2>Match Three Game</h2>

	<div class="board">
		{#each grid as griditemrow, i}
			{#each griditemrow as griditem, j}
			<div
				class="gridItem"
				draggable="true"
				on:dragstart={(ev) => dragStart(ev, i * width + j)}
				on:dragover={(ev) => dragOver(ev,  i * width + j)}
				on:drop={(ev) => dragDrop(ev)}
				id={`${i * width + j}`}
			>
				<img src={griditem.backgroundImage} alt={griditem.name} width="40px" height="40px"/>
			</div>
			{/each}
		{/each}
	</div>
</main>
Above code will help us in having a simple drag and drop of the grid items.
- Drag start - Store the index of the item being dragged
- Drag Over - Store the index of the item where is user is currently hovering. Preventing the default event will allow us to drop the item. So we are checking for valid moves and only allow the user to drop the item in the valid grid
- Drag drop - Use both the index and swap the items
The logic for valid transformations
We can go in-depth into the valid moves in the dragOver function
-
Check if the replacing item is present on the left or right side of the dragged item
- One more special condition to make sure the item are in the same row
-
Check if the replacing item is present at the top or bottom of the dragged item
Clearing matched items
Let’s have a function running at a particular interval to check for matches in the grid. This will clear the matches and replace it with empty grid items. We can also add scores after the match is found
For simplicity, we can just check for three matching items along the row or column. Feel free to extend to code to check for 4 or more items.
onMount(() => {
		InitializeGrid();

		setInterval(() => CheckForRowMatches(), 200);
		setInterval(() => CheckForColumnMatches(), 200);
});

const CheckForRowMatches = () => {
		for (var i = 0; i < width; i++) {
			for (var j = 2; j < width; j++) {
				if (
					grid[i][j].type != GridItemType.EMPTY &&
					grid[i][j].type == grid[i][j - 1].type &&
					grid[i][j].type == grid[i][j - 2].type
				) {
					grid[i][j] = EmptyGridItem;
					grid[i][j - 1] = EmptyGridItem;
					grid[i][j - 2] = EmptyGridItem;

					score = score + 50;
				}
			}
		}
	};

	const CheckForColumnMatches = () => {
		for (var j = 0; j < width; j++) {
			for (var i = 2; i < width; i++) {
				if (
					grid[i][j].type != GridItemType.EMPTY &&
					grid[i][j].type == grid[i - 1][j].type &&
					grid[i][j].type == grid[i - 2][j].type
				) {
					grid[i][j] = EmptyGridItem;
					grid[i - 1][j] = EmptyGridItem;
					grid[i - 2][j] = EmptyGridItem;

					score = score + 50;
				}
			}
		}
	};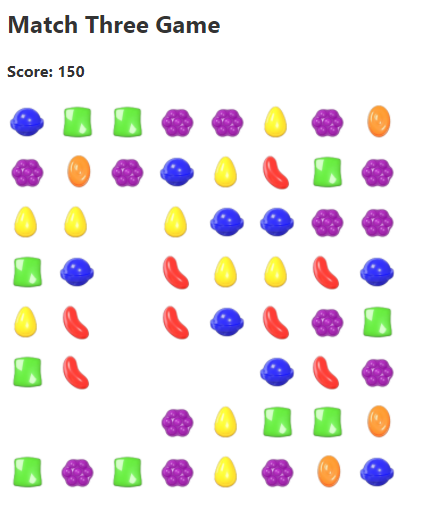
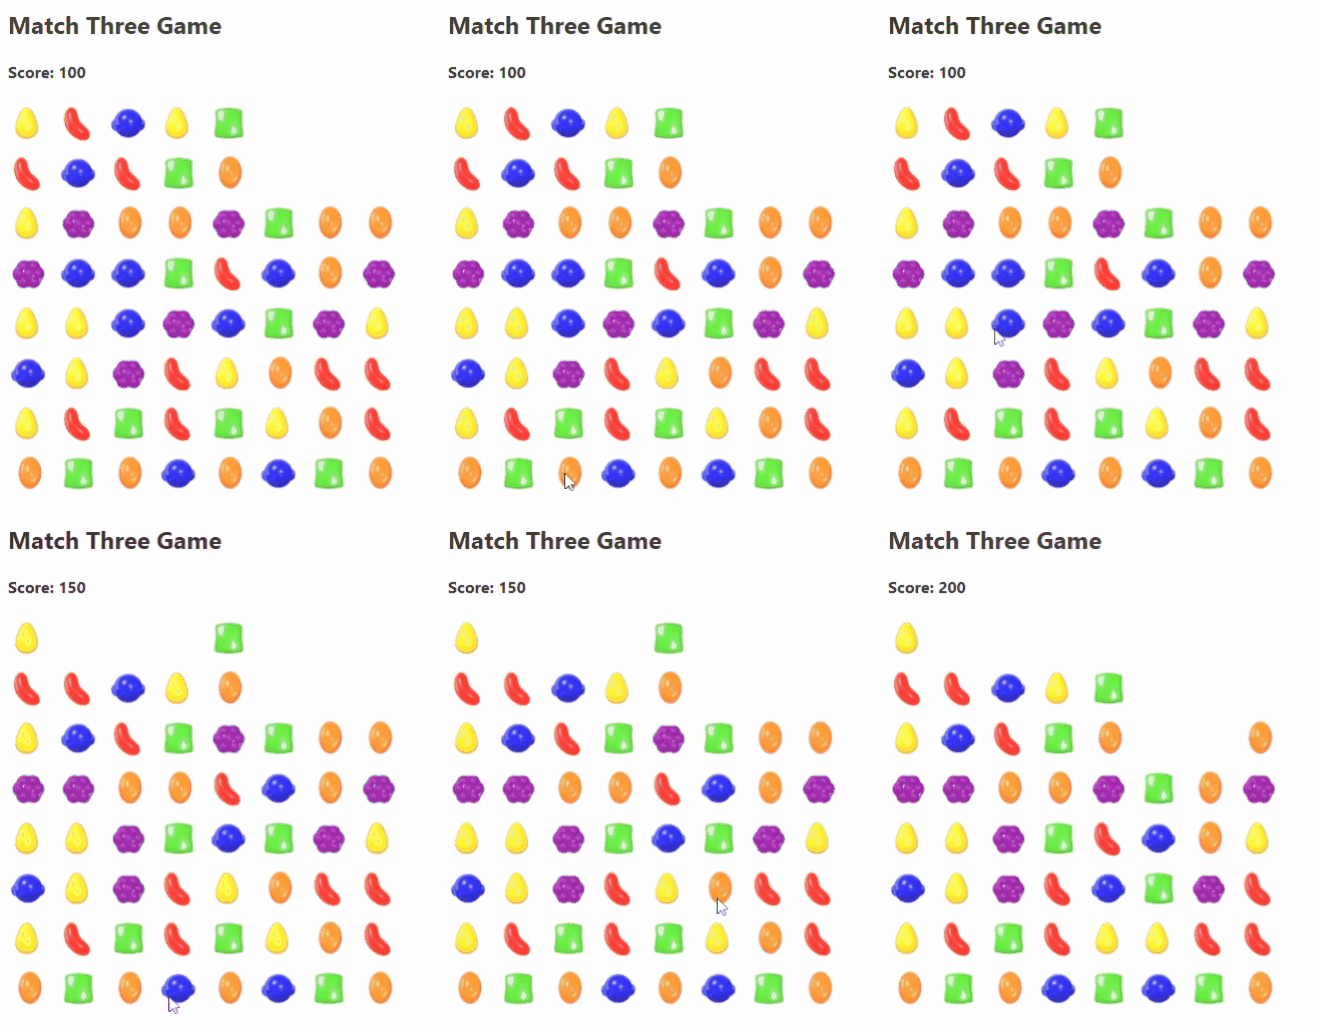
Wow! that’s great progress for adding simple clearing logic in a timer. One issue is that we need the grid items to drop down once they are cleared. We might need to simulate the whole earth to have gravity working right? Maybe
Simulate Gravity
Instead of worrying about the Earth’s gravity, let cheat as usual as developers and run the gravity logic in a timer to make the items fall down.
onMount(() => {
		InitializeGrid();

		setInterval(() => CheckForRowMatches(), 200);
		setInterval(() => CheckForColumnMatches(), 200);

		setInterval(() => SimulateGravity(), 200);
});

const SimulateGravity = () => {
	for (var i = 1; i < width; i++) {
		for (var j = 0; j < width; j++) {
			if (grid[i][j].type == GridItemType.EMPTY) {
				const currentIndex = i * width + j;
				const topItem = (i - 1) * width + j;
				SwapItems(currentIndex, topItem);
			}
		}
	}
};
Add new grid items
Loop through the first row and check for an empty grid. Spawn a new item at the empty grid and let gravity take over
onMount(() => {
		InitializeGrid();

		setInterval(() => CheckForRowMatches(), 200);
		setInterval(() => CheckForColumnMatches(), 200);

		setInterval(() => SimulateGravity(), 200);
		setInterval(() => AddItems(), 200);
	});

const AddItems = () => {
		for(var j=0; j<width; j++) {
			if (grid[0][j].type == GridItemType.EMPTY) {
				var randIndex = Math.floor(Math.random() * gridItemList.length);

				if (randIndex < gridItemList.length)
					grid[0][j] = gridItemList[randIndex];
			}
		}
	}
Source Code
Source code for this project is available in this multi-project repository
https://github.com/eternaldevgames/svelte-projects/tree/master/svelte-match-three-game
Summary
The most important thing about games is adding polish to the gameplay and having nice interactions for the users and provide good visual feedback to the user interactions. Those are the things that make your games stand out. We can add more game juice to this game.
Stay tuned to our discord channel
